

August, 2003. It took more than a month to complete the canopy. I wanted to get it finished before winter and the temperature became too low to work on the acrylic. But with the help of a room heater I managed to finish it before the season change. Workshop temperature was always above 25°C.
Why the worry? Well I was concerned about cracking the acrylic after so many horror stories by other builders. Apart from the cost of the canopy itself, import of such a large carton is not a trivial expense. And all that time wasted. I didn’t want to think about it.
Anyway I talked to an expert in making canopies and he gave me the confidence to get into it and work with the material. It’s like glass. Push it too far and it snaps without warning. So I made the workshop warm and treated it like “soft glass”.
Eventually I had it done. And what a change it has made. The straight lines of the fuselage are now a smooth and continuous curve.

I decided to make a jig to hold the canopy while working on it. This was a good move. It allowed me to test fit on the job, then take it back to the jig to work on it with a heater underneath.
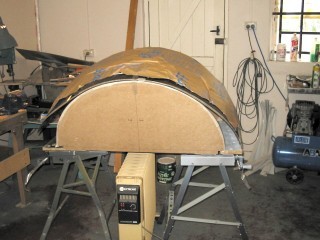
The jig supported the material well and gave me confidence to cut and drill. I cut the material with a 3″ grinder and cutoff wheel. Seems a bit aggressive, but it worked well by going slowly and grinding away without heating the acrylic so much that it became soft and sticky. Trim to size with a belt sander. Final finish with a foam sanding block.

I was reluctant to drill on the job or to use clecos, so I held the acrylic with masking tape, marked the hole positions, took it off and drilled on the jig. I used drill bits with the cutting face squared off, deburred with a countersink bit and finally followed up with some “wet & dry” 600 smooth the holes and edges.
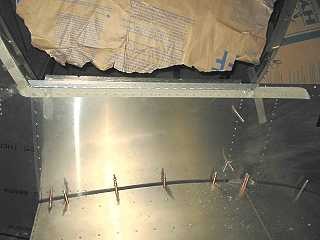
The canopy is hinged on the right side. The plans call for riveting the acrylic between the hinge and canopy frame. I didn’t like this too much because the acrylic took quite a bend and the rivets gave no control over pressure. So I used screws tapped into the frame. The frame is 1/2″ square tube and it was quite a job to get the fit right.
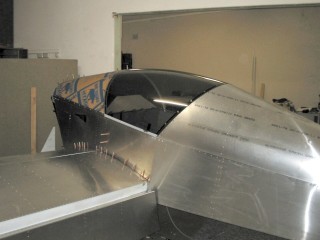
The canopy latch and fittings were a job in themselves but finally I got it all to work and the canopy was done. And no cracks.

A smooth job. I think the canopy profile gives the Sonex a character all its own. Now it all comes apart to work on the instrument panel and fuel tank. The next page in Lynn Jarvis’s Sonex project is the engine.
Lynn Jarvis’s Sonex project
| 1. Introduction | 2. Sonex specifications | 3. Building the Sonex |
| 4. The tail and spar | 5. The wing | 6. The aft fuselage | 7. More on the fuselage |
| 8. It all comes together | 9. The canopy | 10. The engine | 11. Electrical | 12. The cowling |
| 13. Paint and polish | 14. Moving | 15. Finishing | 16. First flight | 17. Natfly 2004 |